Have you ever tried the virtualization feature to run two or more operating systems on your single Windows PC? If yes, then you are aware of the Windows built-in Microsoft Hyper-V tool.
Hyper-V is a Microsoft tool that lets you create and run multiple Windows operating systems on your single device. It also supports Linux and FreeBSD. It is a great tool for you to try out other operating systems.
However, some Windows users have noticed that Hyper-V runs in the background on their PCs even when they aren’t using it. Due to this, it consumes lots of RAM and drains battery life.
For this reason, many users want to disable it on their PC. So, In this article, I have shared several methods to disable Hyper-V on Windows 10 and 11.
Also, read How To Disable Lock Screen On Windows 10
How to Disable Hyper-V on Windows
Below are some of the methods you can use to disable Hyper-V on your Windows 10 and 11. Let’s check it out.
Method 1: Using Control Panel
The easiest and simplest way to disable Hyper-V on your Windows PC is by using the Control Panel. Follow the steps below to turn off Hyper-V using the Control Panel.
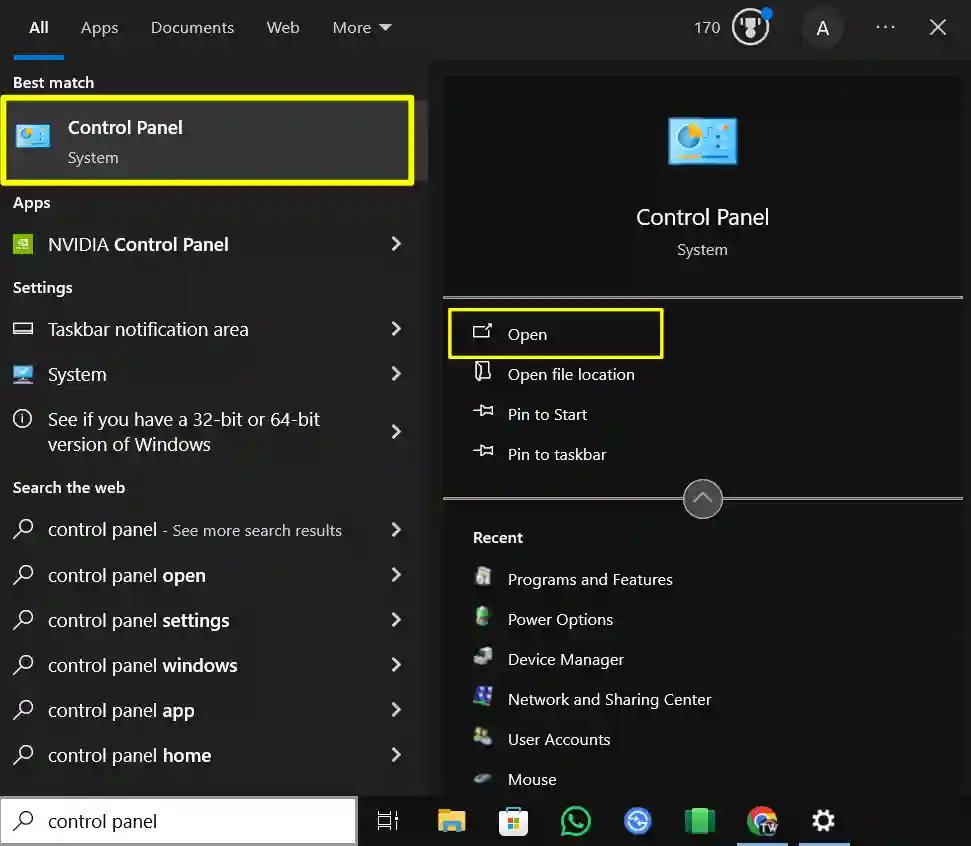
1. First of all, type “Control Panel” in the Windows search bar and click on Open.
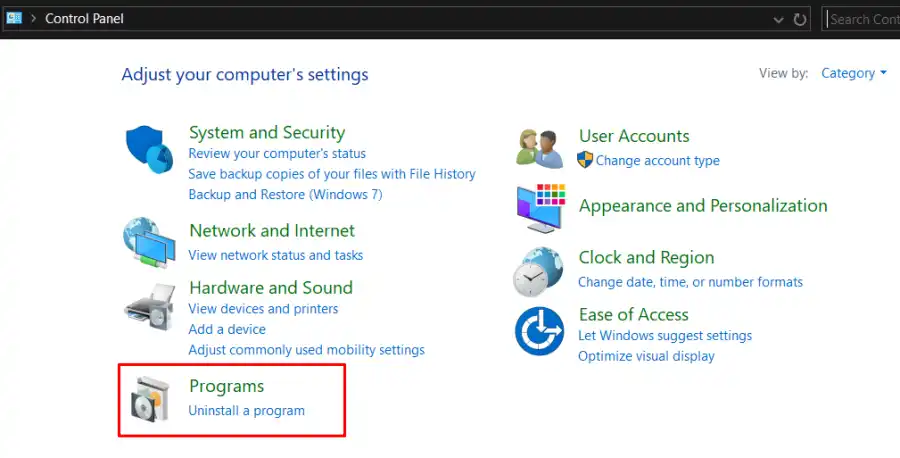
2. In the Control Panel, navigate to “Programs” or “Programs and Features”.
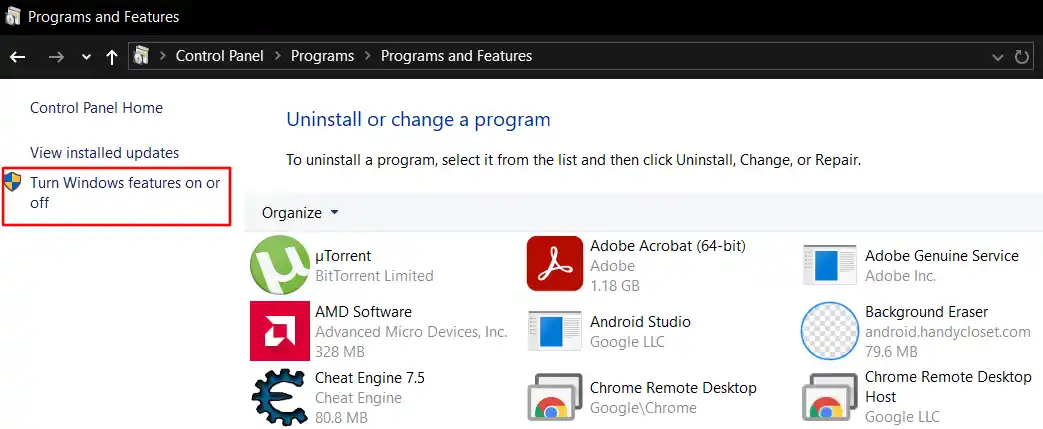
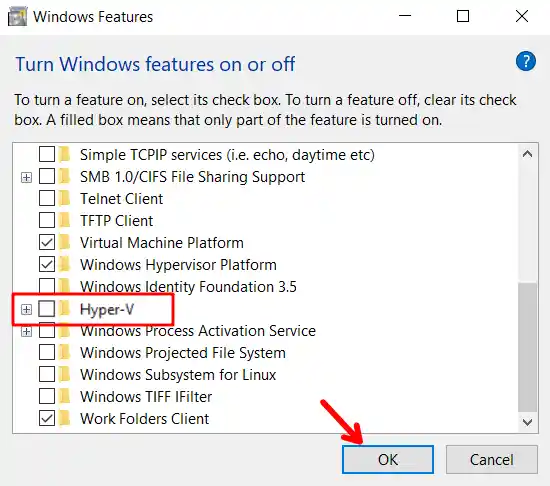
3. On the left side, click Turn Windows Features on or off.
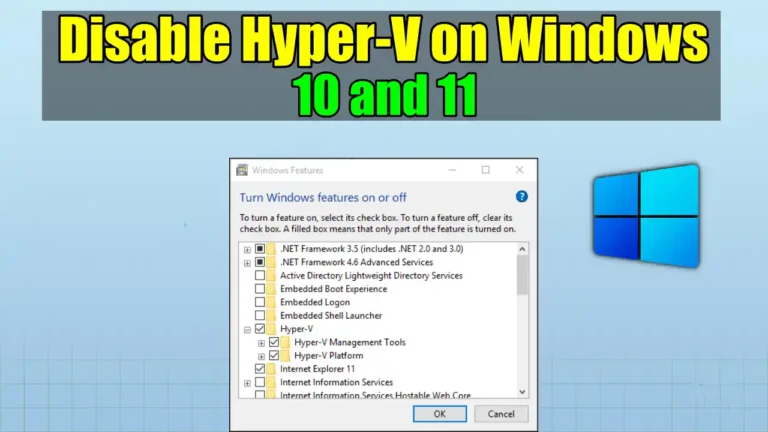
4. On the Windows Features prompt, scroll down and uncheck the Hyper-V option. Once done, click on the OK button.
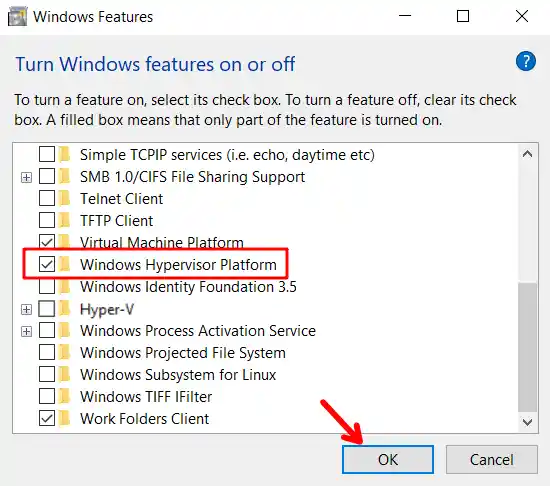
5. On Windows 10 Home devices, uncheck Windows Hypervisor Platform then click on the OK button.
That’s it. After that, Restart your PC.
Method 2: Using Windows PowerShell
If you do not see the Hyper-V option in the above method, you can try disabling it using the PowerShell command. Here’s how to disable Hyper-V on Windows using the Windows PowerShell Command.
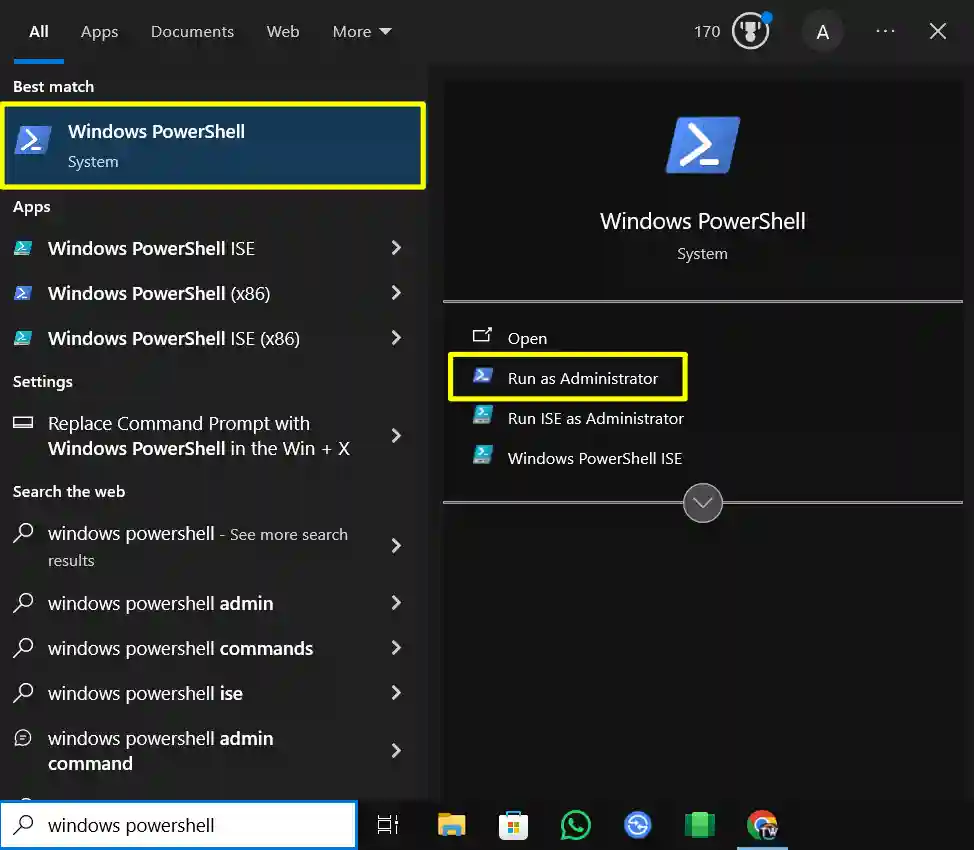
1. First, type “Windows PowerShell” in the Windows search bar and click on “Run as Administrator”.
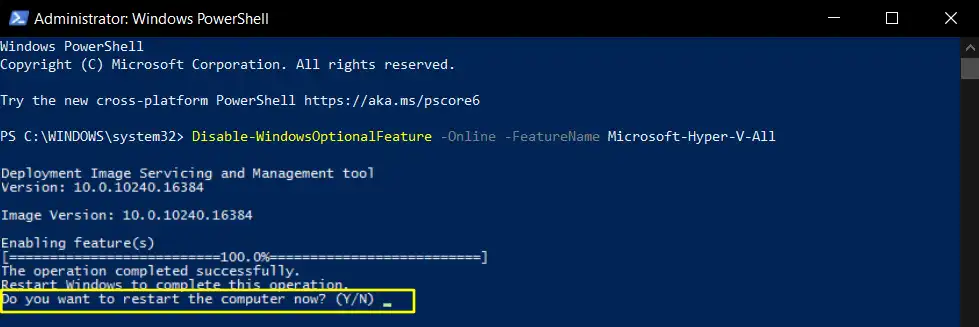
2. Then, type the below command in the PowerShell window and press Enter to execute it:
Disable-WindowsOptionalFeature -Online -FeatureName Microsoft-Hyper-V-All

3. Then, on the next line, type Y and press Enter to restart the PC and apply the changes.
That’s it. This will disable Hyper-V on your PC.
Method 3: Using BCDEdit Command
If the above method gives you an error while disabling Hyper-V, then you can try using the BCDEdit command-line utility method. Here’s how to use it.
1. First, type “Command Prompt” in the Windows search bar and click on “Run as Administrator”.
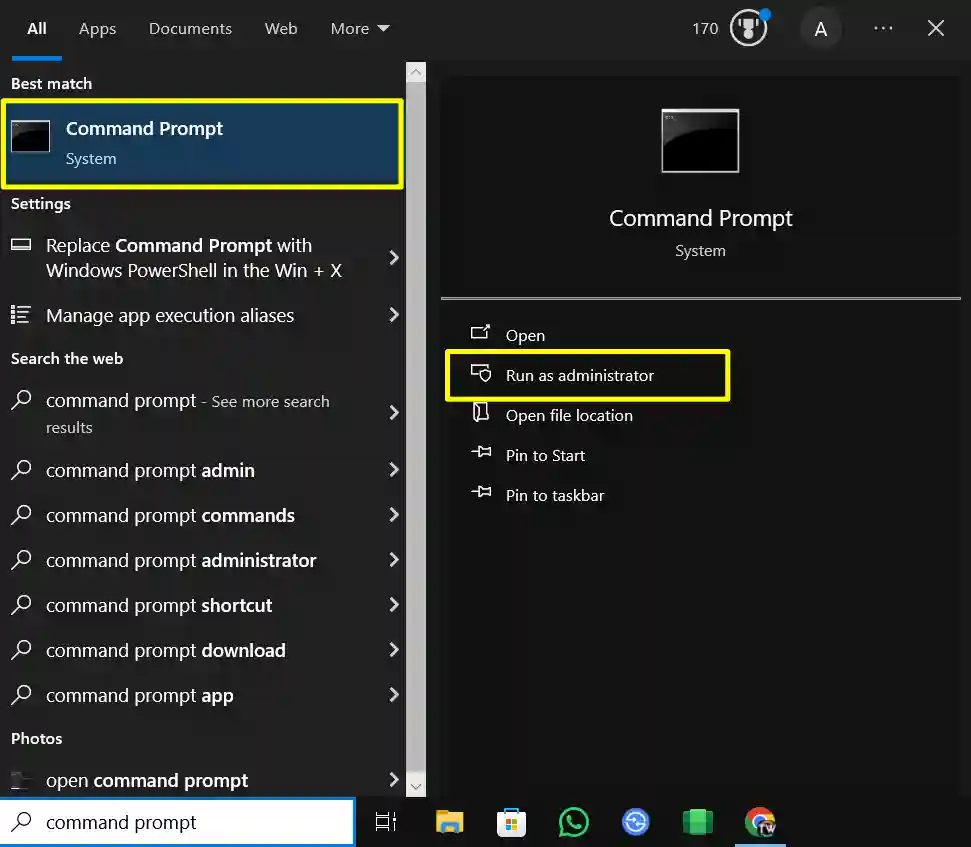
2. Then, type the below command in the Command Prompt window and press Enter to execute it:
bcdedit /set hypervisorlaunchtype off
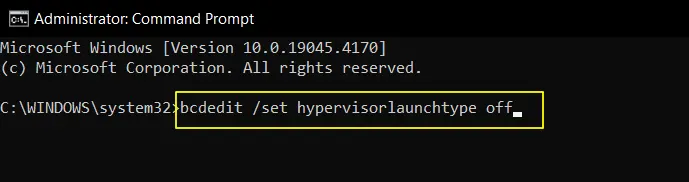
After executing the command, close the command prompt and restart your device.
Method 4: Using DISM Command
DISM command is mainly used to fix corrupted Windows system image files. But you can also use this command to disable Hyper V on your PC. Here’s how to do it.
1. First, type “Command Prompt” in the Windows search bar and click on “Run as Administrator”.
2. Then, type the below command in the Command Prompt window and press Enter to execute it:
dism /online /disable-feature /featurename:Microsoft-hyper-v-all
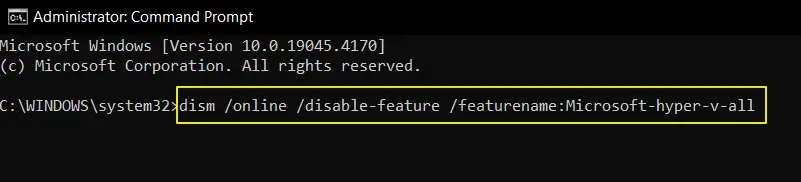
After executing the command, wait for the process to complete. Then, restart your PC to apply the changes.
Method 5: Using Registry Editor
You can also use Registry Editor to disable Hyper V on your PC. To do this, follow these steps.
1. First, Press Win + R on your keyboard, type regedit, and hit Enter.
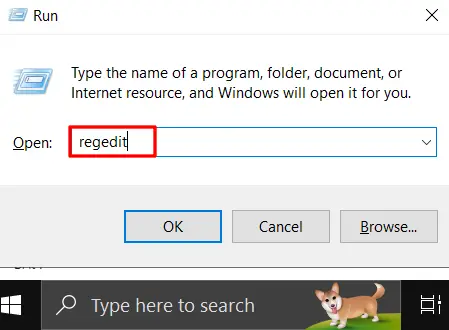
2. Then go to the following path.
HKEY_LOCAL_MACHINE\SYSTEM\CurrentControlSet\Control\DeviceGuard

3. After that double click on EnableVirtualizationBasedSecurity and change the value to 0 (zero). Then click OK.
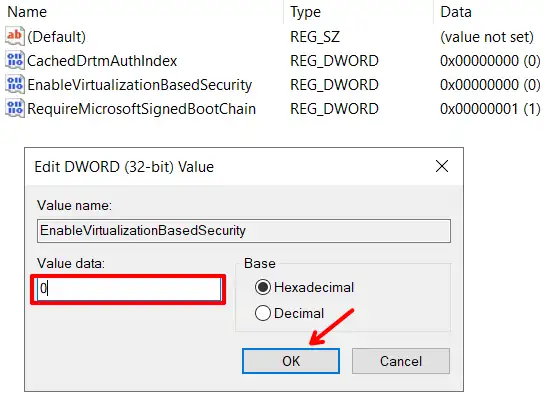
After that, restart your PC. This will disable Hyper V on your Windows.
Method 6: Using BIOS
If none of the above methods work for you, you can try this method. Hyper-V utilizes hardware virtualization technology to run virtual machines on your PC.
So, to disable Hyper-V, you can deactivate hardware virtualization using the BIOS. However, once you disable hardware virtualization from the BIOS, you won’t be able to use other third-party virtualization software.
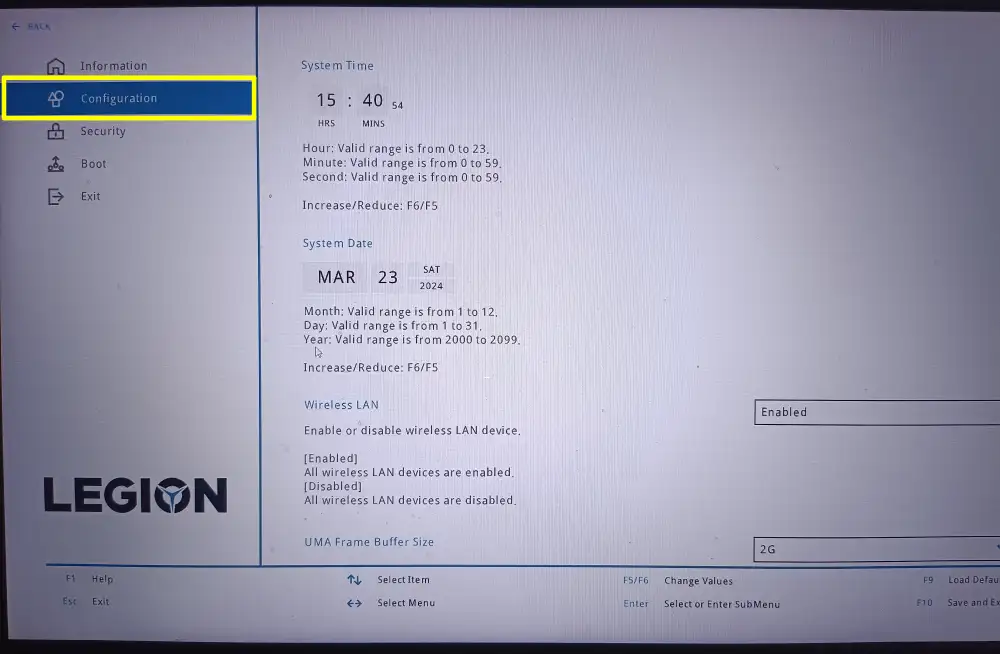
1. First of all, restart your Windows.
2. Once you see the Windows logo, press F-11 or Esc key to open the BIOS Settings page. The key to open the BIOS menu is different on all PCs or Laptops.
So, first, make sure to find your key from the official manufacturer’s website
3. Once you’re into the BIOS menu, switch to the Configuration tab.
4. Now, Use the arrow keys to select the Virtualization Technology option. Then select the Disabled option.
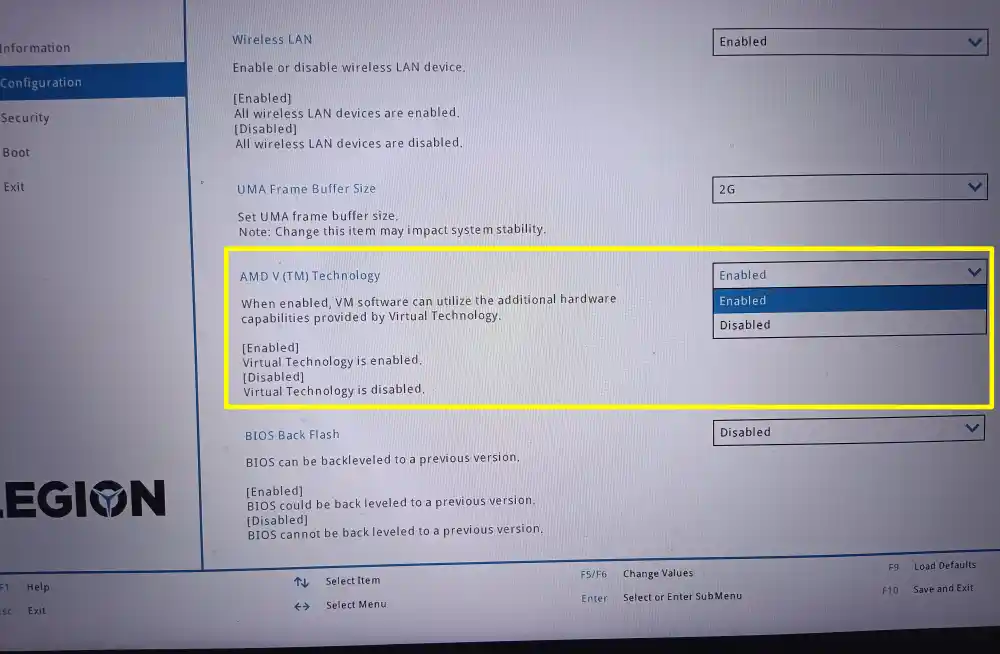
That’s it. Now save your changes by pressing the F10 key and exit. Then Boot your PC. Now you will notice that Hyper-V won’t be enabled anymore.
Conclusion
So, that’s all. These are some of the simple and easiest methods to disable Hyper-V on your Windows operating system. Also, if you know any other method, feel free to share it with us in the comments below.
Further Reading
- How To Fix Err_Internet_Disconnected Error
- How To Solve ‘No Internet, Secured’ Error On Any Windows
- How To Stop Light Flickering In iPhone Videos