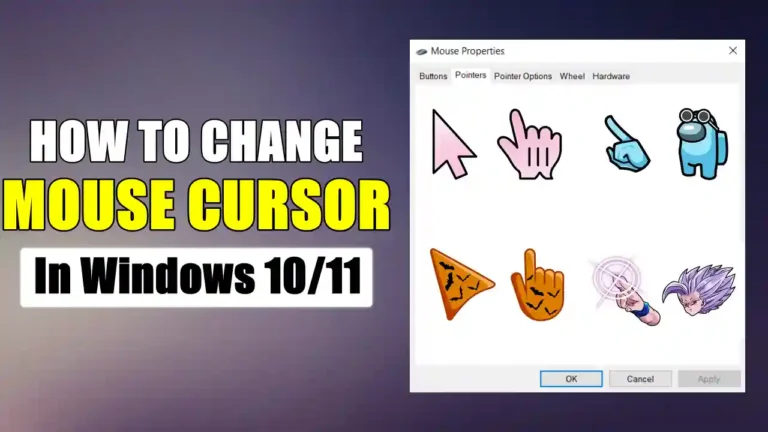
The mouse cursor is one of the most visible and frequently used parts of your computer. It helps you navigate, select, drag, and perform many other tasks on your screen.
However, sometimes you may want to change the style of your mouse cursor to suit your preferences, needs, or mood. For example, you may want to make it bigger, smaller, or more colourful.
Luckily, Windows offers several easy ways to customize your mouse cursor. You can change its size, color, and shape, and even use your own images or animations as the cursor. In this article, we will show you how to change the mouse cursor in Windows 10/11 using different methods.
Also, Read How To Remotely Control A PC Without Installing Software
Steps To Change Mouse Cursor Using Setting
The easiest way to change the mouse cursor in Windows is to use the built-in Settings app. This method allows you to adjust the size and colour of your mouse pointer, as well as choose from some predefined cursor themes.
To change the mouse cursor in Windows 10/11 using Settings, follow these steps:
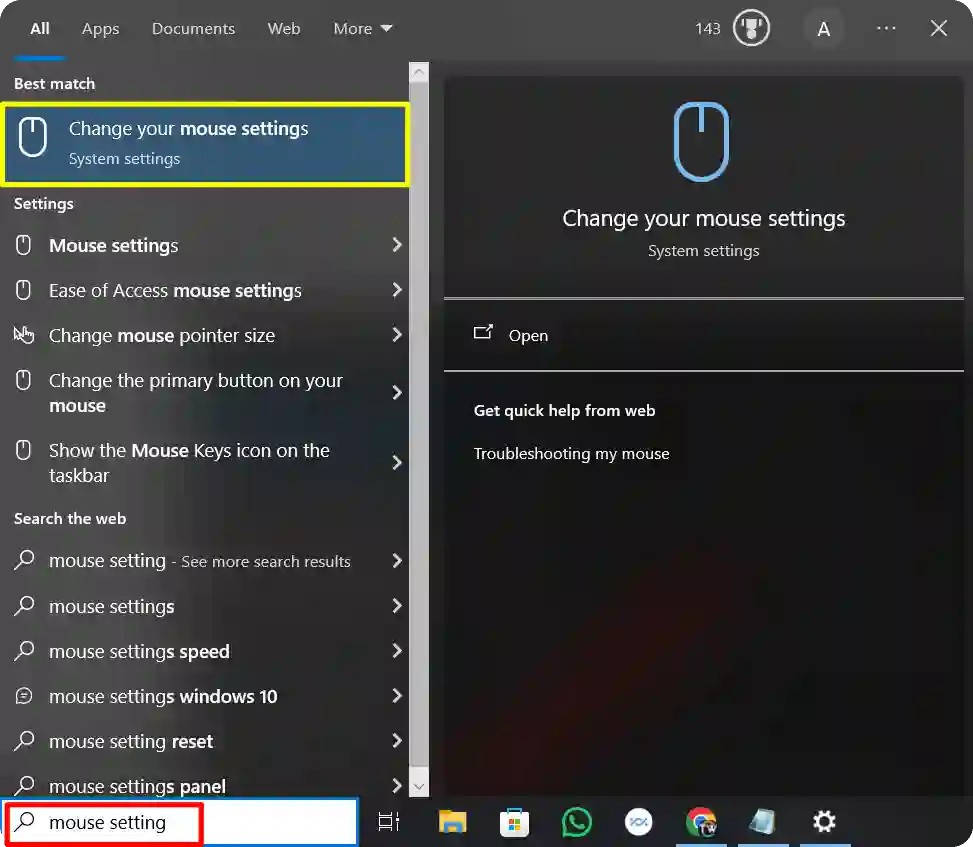
1. First, open the Windows search bar and type “mouse settings”. Then, click on the “Change your mouse settings” option.
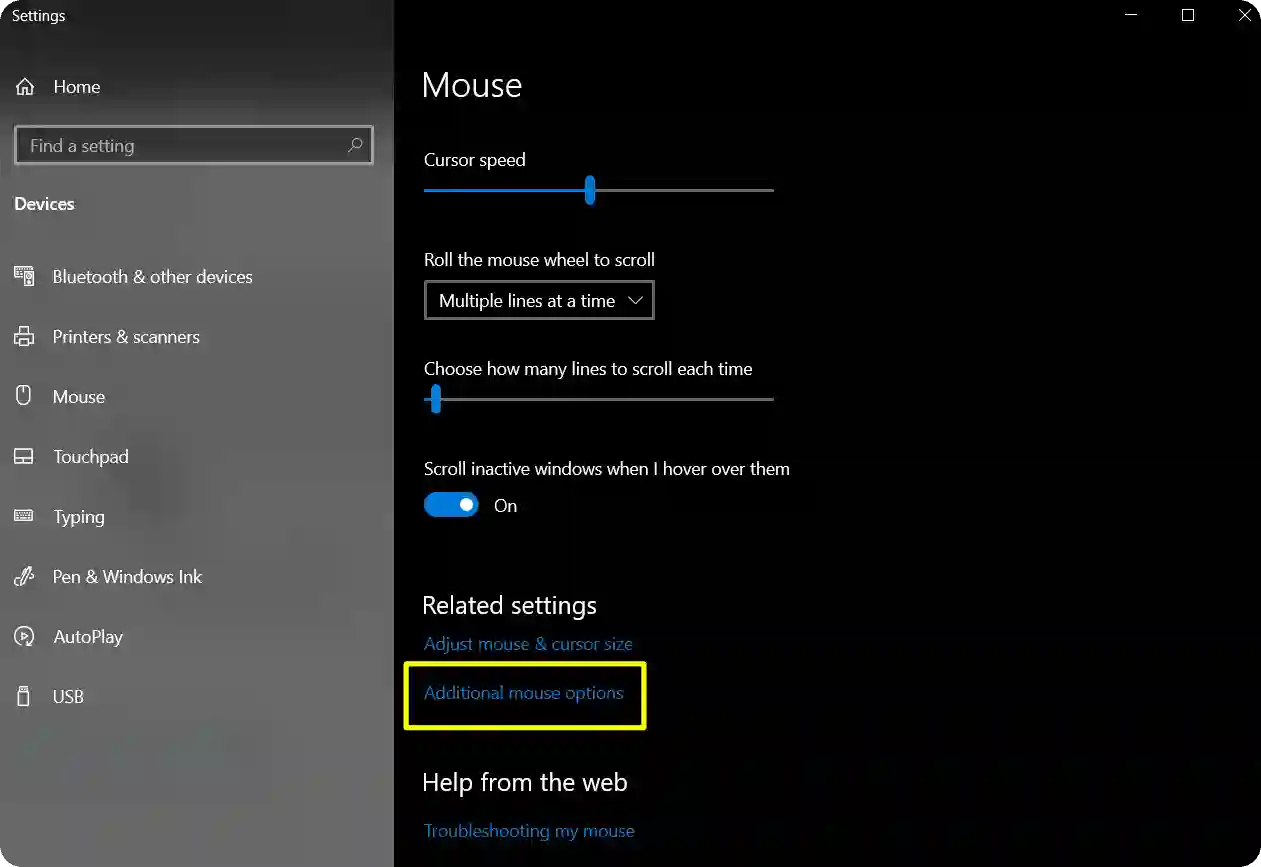
2. After that, in the “Change your mouse settings” window, click on “Additional mouse options” to open up the Mouse Properties option.
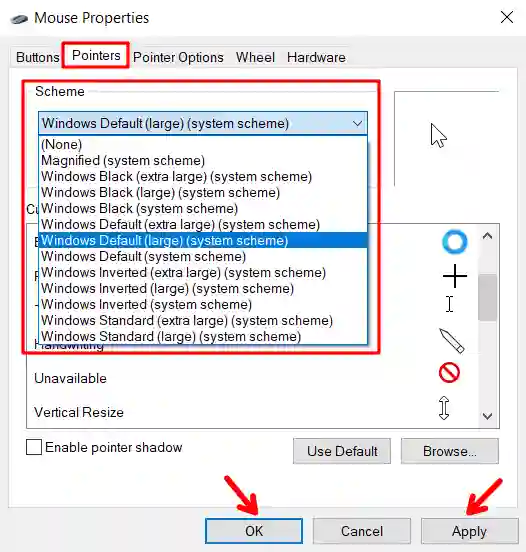
3. Now, to change the appearance of your mouse cursor, go to the “Pointers” tab, and then click on the dropdown menu under “Scheme” to view the available cursor schemes.
Next, choose the cursor scheme that you like the most, and then click “OK” and then “Apply” to confirm your selection. Your mouse cursor should change immediately.
How To Get Customised Cursor?
If you want more customization, Windows also allows you to install third-party cursor packs that offer a variety of themes, styles, and animations for your mouse pointer. You can find many cursor packs online, such as on custom-cursor.com or DeviantArt. Now, to install the cursor pack follow the steps below.
1. First, you need to download the cursor files and place them in a folder on your computer.
2. Next, follow the same steps mentioned above (up to step 2) to access the mouse properties option.
3. Now, within the mouse properties option, click on “Browse.”
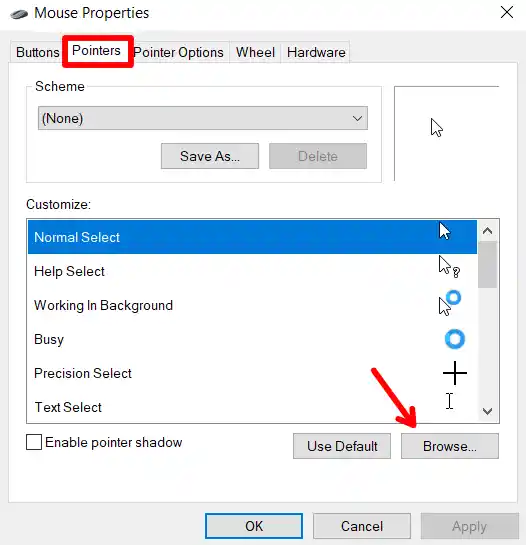
4. Next, in the browsing menu, you’ll find all the available Windows default cursors. If you want to add your own cursor, choose the downloaded cursor folder, select your preferred cursor style, and then click on “Open.”
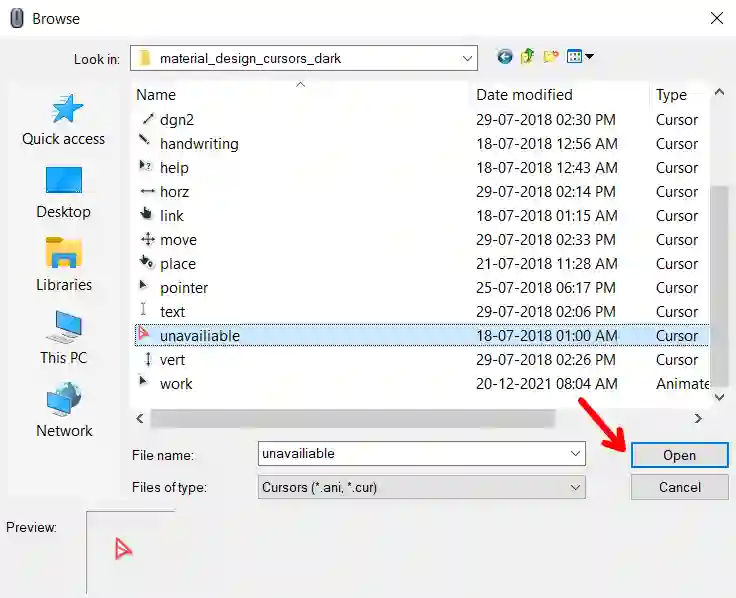
5. Finally, click “OK” and then “Apply” to confirm your selection.
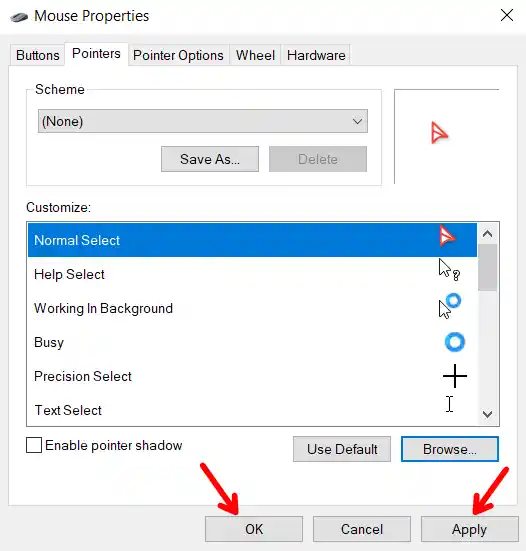
That’s it. This is how you can add your own cursor design.
Steps To Change The Cursor Size and Color
If you are more interested in changing the cursor size and colour, you can easily do it without any problem. Windows provides a few options to make your cursor more visible and easier to use, such as increasing the pointer size or changing the pointer colour.
To do it, follow the steps below.
1. First, open the Windows search bar and type “mouse settings”. Then, click on the “Change your mouse settings” option.
2. After that, in the “Change your mouse settings” window, click on “Adjust Mouse and Cursor Size”.
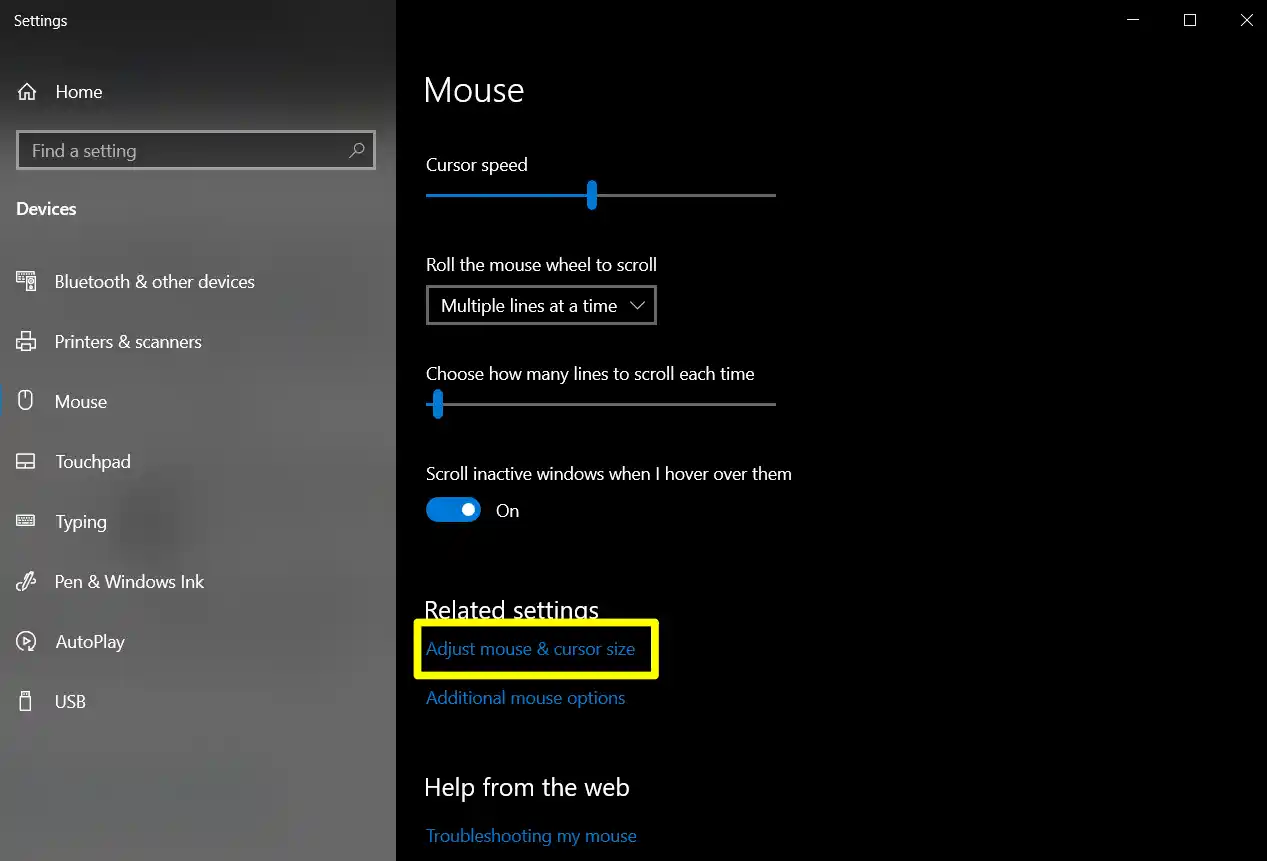
3. Here, you can change the pointer size and colour according to your requirements.
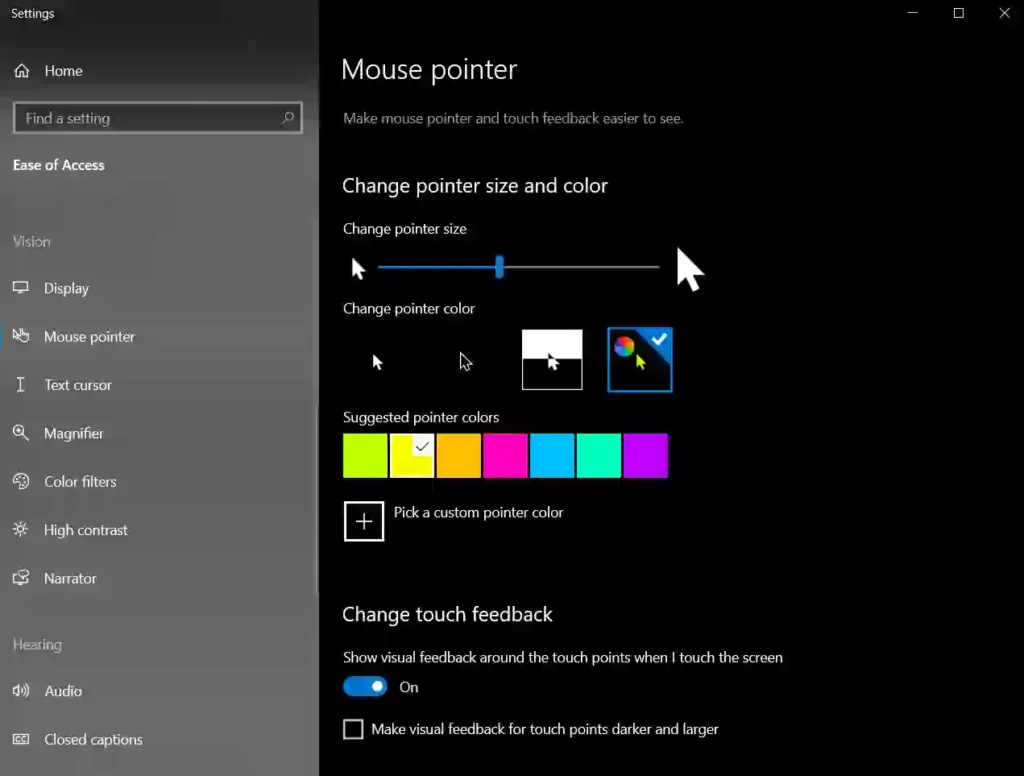
That’s it. You are done.
Bonus Tip: Using Custom Cursors for Accessibility
During my research, I found that if you have vision problems, Windows also provides accessibility options to improve cursor visibility. In the Ease of Access settings (found under Settings > Ease of Access > Mouse pointer), you can:
- Change the size of the cursor to make it bigger.
- Change the colour, including bright or high-contrast colours like yellow, which helps it stand out against any background.
Conclusion
Changing the mouse cursor in Windows is a simple and fun way to personalize your computer. You can change the size, colour, shape, and style of your mouse cursor. You can also use your own custom images or animations as cursors.
