ISO files are disk image files that contain a copy of a CD, DVD, or Blu-ray disc. You can use ISO files to install software, backup data, and install games or create bootable media. However, before you can access the contents of an ISO file, you need to mount it on your computer. Mounting an ISO file means creating a virtual drive on your computer.
There are different two ways to mount an ISO file on Windows. In this article, we will show you how to mount an ISO file on Windows 10/11, using built-in tools and using third-party apps.
1. How To Mount ISO Files Using Windows Built-In Tool
Windows 10 and 11 have native support for ISO files, which means you can easily mount the ISO files without installing any third-party software. Here are the steps to mount an ISO file on Windows 10/11:
1. First, Locate the ISO file you want to mount on your computer.
2. After that, Right-click on the ISO file and select the Mount option from the context menu. Alternatively, you can double-click on the ISO file.
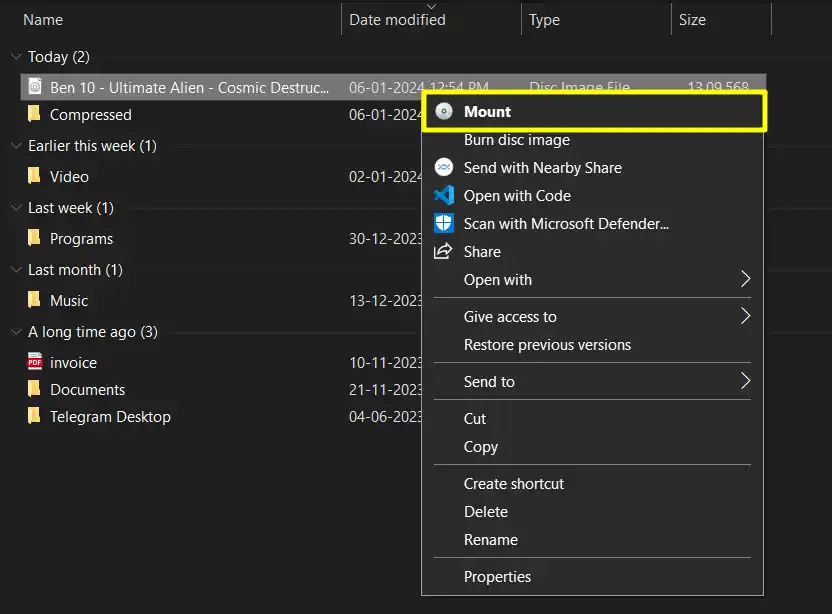
3. Then, a new virtual drive will appear under “This PC” in File Explorer, with a drive letter assigned to it.
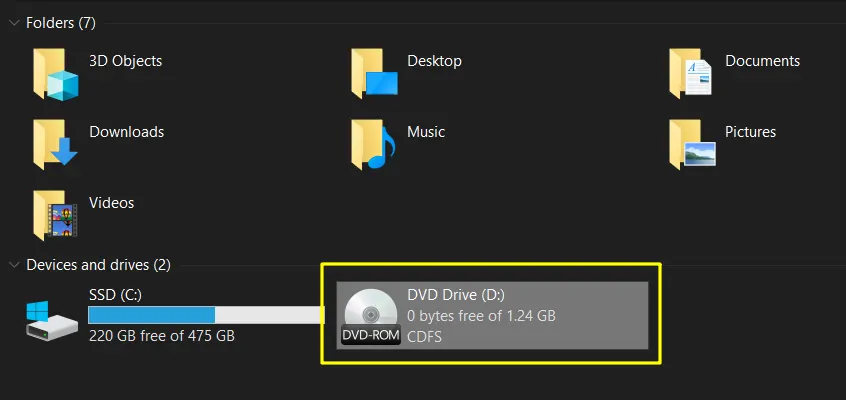
That’s it. Now you can access the contents of the ISO file by opening the virtual drive.
2. Mounting an ISO File on Using Third-party Tools
Mounting an ISO file with the Windows built-in tool is a great option, but it does not offer any additional advanced features. For example, you cannot mount other formats such as ZIP, RAR, 7-Zip, etc.
Moreover, you cannot create, edit, compress, or split archives into smaller parts with this tool. So, To use the advanced features, you will need to use third-party mounting tools.
We have already written an article where we shared the list of 8 Best ISO Mounters for Windows 10/11. You can choose any tool from there and install it on your Windows. After that, follow the steps below to mount the ISO files using these tools.
1. First, download any mounting tool from the provided article. For now, I am using WinRAR.
2. After installing the software, find the file, right-click on it, and choose either ‘Mount’ or ‘Extract Here’.

3. Once the file is extracted, the contents of the ISO file will be extracted into the folder.
After that, you can easily access the contents of the ISO file from that folder.
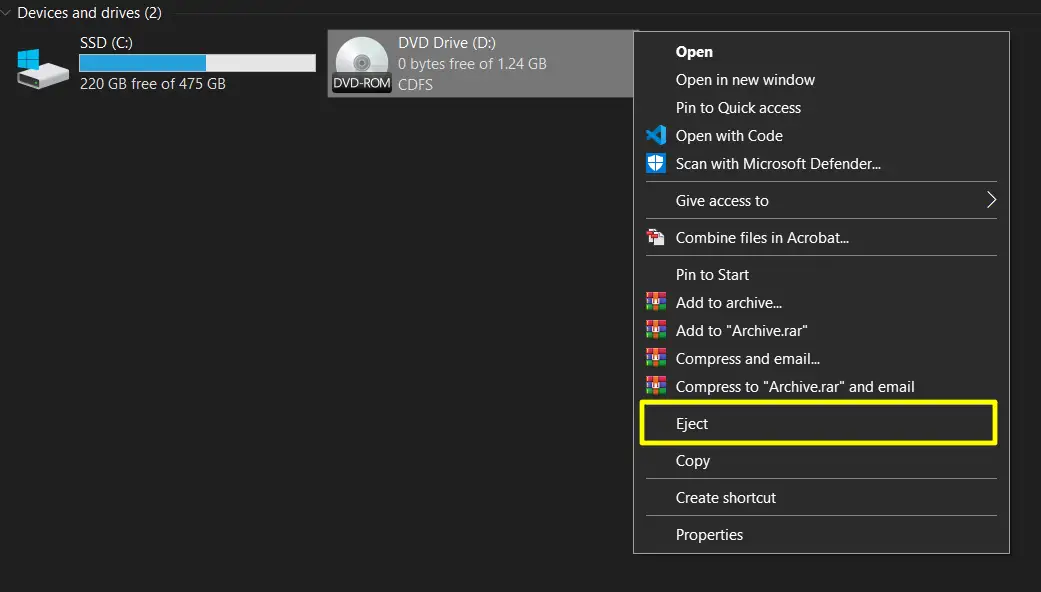
How To Unmount ISO File
To unmount an ISO file on Windows 10/11 is very easy. To do so, follow the steps below.
- Right-click on the virtual drive and select the Eject option from the file Explore.
- You can also use the Eject button on the ribbon menu of File Explorer.
- After you click on the eject button, the virtual drive will disappear from This PC and the ISO file will no longer be accessible.
Conclusion
Mounting an ISO file on Windows is a simple and easy process. You can use the Windows built-in tools or you can use third-party mounting software to mount and unmount ISO files with ease. I hope this article was helpful and informative for you. If you have any questions or feedback, please leave a comment below. Thank you for reading!
Recommended Articles
How To Change WhatsApp 24-hour Time Format To 12-hour
How To Convert Jio SIM To ESIM On Android And iPhone?
How to Hide The Following List on Instagram