
Do you want to learn How To Screen Record On a Chromebook? Whether you want to create a tutorial video or record the gameplay of a game, we’ve got you covered.
In this article, I will show you various ways to record screens on a Chromebook. If you have a Chromebook, you probably know that you had to use a third-party app to record screens. But, In 2021, Google added the built-in screen record feature for Chromebooks so you don’t need to use a third-party app to do it.
If you’re running Chrome OS 89 or above, you can use a built-in screen recording tool to record your Chromebook’s screen. Let’s get started and see how to screen record on a Chromebook.
Also, read How to Delete Bookmarks on Chromebook
How To Screen Record On Chromebook
In this article, I am going to show you 2 methods to record a screen. This method works on any Chromebook or ChromeOS desktop.
1. Record Screen on Your Chromebook with Screen Capture
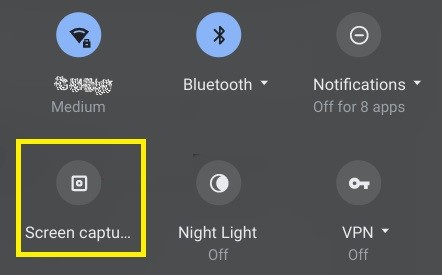
1. FIrst, Open the Quick Settings menu by clicking the clock icon, located in the bottom-right corner. Or, Press Ctrl + Shift + Overview key (above 6 key)” to open the Screen Capture feature.
2. There you will find a “Screen capture” option, and you can click to open it.
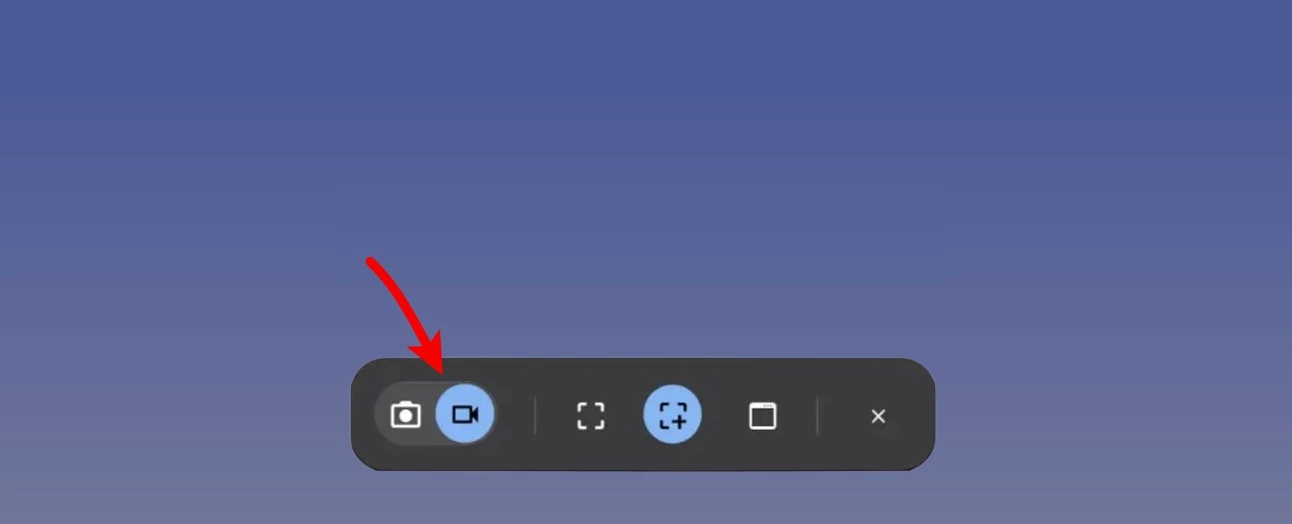
3. The Screen Capture toolbar will appear at the bottom of the screen. Make sure the video icon is selected for screen recording.
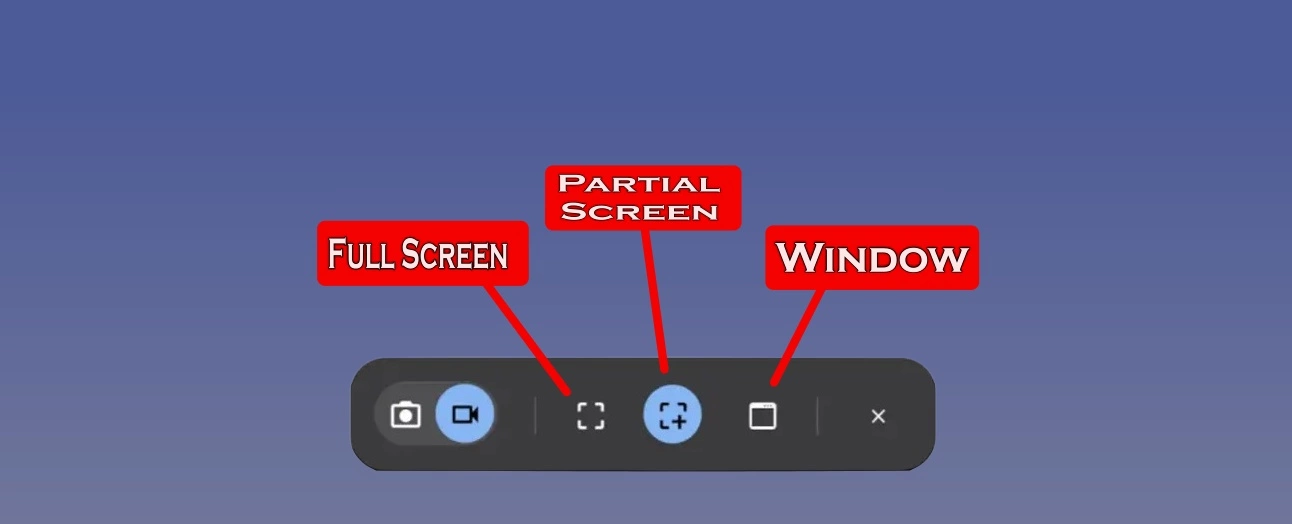
4. Now you can choose different ways to record the screen. You can choose to record the full screen, partial screen, or a specific window. Select one to proceed.
5. Before you start recording, click the gear icon and turn on “Microphone” under “Audio input” to record your audio as well.
6. Finally, hit the “Record” button, and your Chromebook will start recording the screen.
7. To stop the screen recording, click the Red stop button in the taskbar.
2. Record the Screen on Your Chromebook with Screencast
Google has introduced a new screen recording app on Chromebook called Screencast. If you’ve updated your device to Chrome OS 103, you’ll find this app in your app drawer. To use this app, follow the steps below.
1. First of all, make sure that you have updated your Chromebook to Chrome OS 103. After that, open the App Drawer and click on the Screencast app.
2. Now, click on “New Screencast” at the top-left corner to start screen recording.

3. After that, you can choose the full-screen, window, or partial screen to record the screen. The microphone and webcam are enabled by default, which can be disabled from the “Settings” icon at the bottom.
4. Now, click the red icon on the taskbar to start the recording. Once you are done, click on the red “stop” button on the taskbar.
5. You will find the recording in the Screencast app.
Where to find your screen recordings
Like Screenshots, Screen recordings are automatically saved in your Downloads folder. A notification will pop up after you finish recording the screen. Also, Screen recordings are saved as .webm video files.
Conclusion
So these are the two easiest and simplest ways to record the screen on your Chromebook. After reading this guide, I hope you got the answer to your question How To Screen Record On Chromebook? Also, if you are facing any problems, comment down below and let us know.
Recommended Articles
How To Clear App Cache and Data On Android, iOS, and Windows
How to Enable or Disable Two-Factor Authentication on Discord
How to Start Chrome in Incognito Mode by Default (PC & Android)