- Windows Automatic Updates are annoying and can cause unexpected restarts or make applications incompatible.
- You can stop or delay updates using methods like pausing updates, disabling the update service, using the Group Policy Editor, or setting your network as metered.
- Although disabling updates will put the security of your PC at risk, it’s still best to check for updates manually.
Are you tired of Windows 10 automatically downloading and installing updates without your permission? Do you want more control over when and how your Windows updates? If so, you are not alone.
Many Windows 10 users are frustrated with the automatic updates feature, which can cause various problems, such as compatibility issues, or interrupting your work by suddenly restarting.
Luckily, there are a few ways to disable or delay automatic updates on Windows 10. In this article, I will show you three ways to stop Windows 10 from automatically updating.
Also, read How To Mount ISO Files In Windows 10/11
How to Stop Automatic Updates on Windows 10
Before proceeding, you should be aware of the risks of disabling updates. Windows Updates are designed to keep your system secure and up to date, and by stopping them, you may expose your computer to viruses, malware, or performance problems.
Therefore, I recommend that you disable updates only temporarily, or manually check for updates regularly.
Method 1: Pause Updates for 7 Days (Temporary Solution)
One of the easiest ways to stop automatic updates on Windows 10 is to pause them for a certain period of time. This option is available in the Settings app, and it allows you to delay updates for 7 days. To pause the updates, follow these steps:
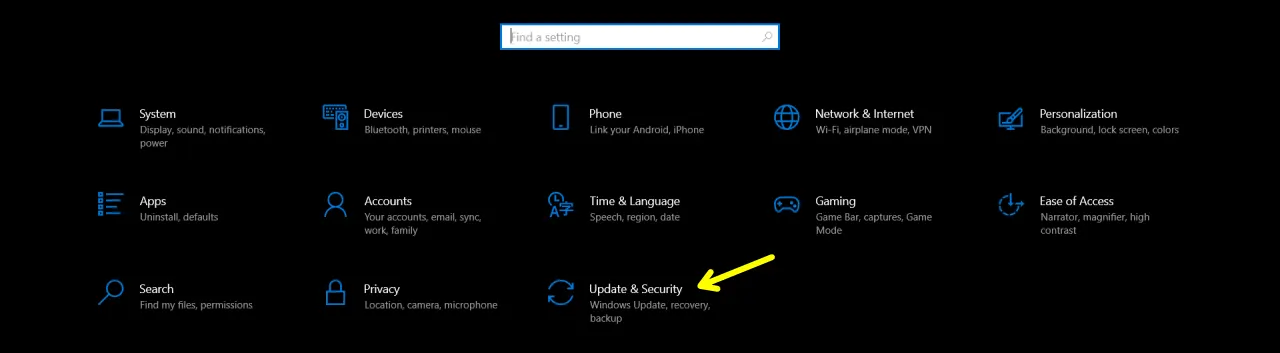
1. First, open the Windows Settings by pressing Windows key + I on your keyboard.
2. In the Settings menu, click on the Update & Security option.
3. Then, click on Windows Update. After that, Click on the “Pause updates for 7 days” option.
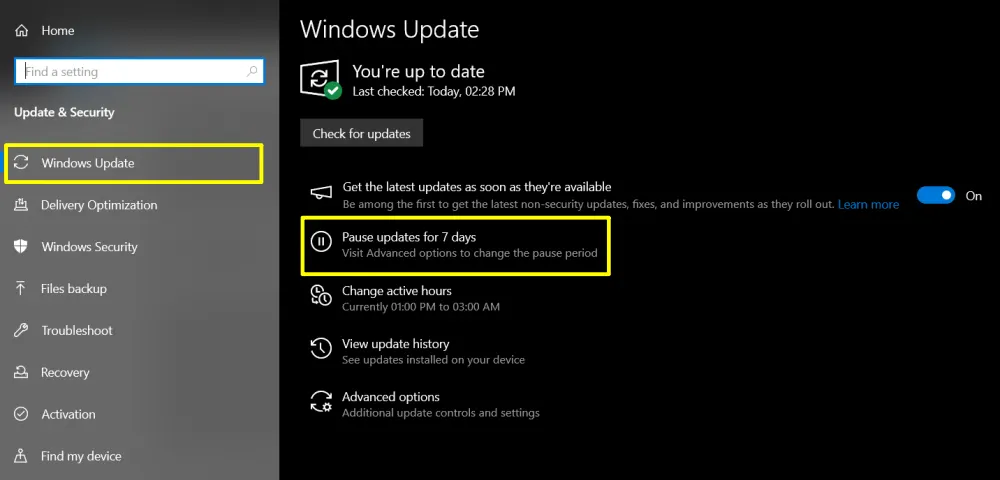
If you need a longer pause, click Advanced options and extend the pause up to 35 days.
That’s it. After you complete these steps, Windows 10 will not download or install any updates until the date you specify. However, once the pause period is over, you will need to install the latest updates before pausing them again.
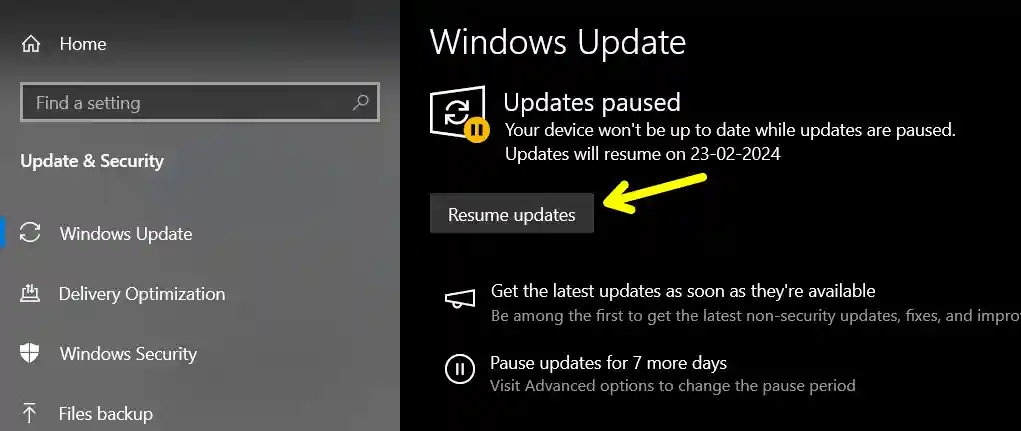
If you want to undo the changes and resume the Windows Update again, you can do this at any time. Simply follow the instructions above, but at step 3, click on the “Resume update” button.
Method 2: Disable the Windows Update Service (Semi-Permanent Solution)
Another way to stop automatic updates on Windows 10 is to disable the Windows Update service, which is responsible for downloading and installing updates. This method requires you to use the Services app, which is a tool that allows you to manage various system services.
To disable the update service, follow these steps:
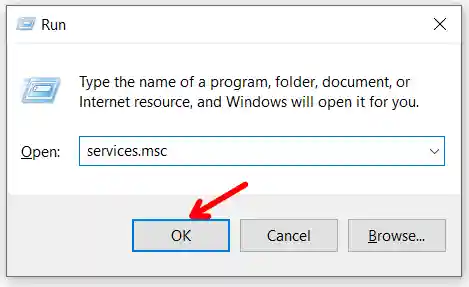
1. First of all, open the Run dialog box by pressing the Windows key + R on your keyboard.
2. Then, type Services.msc and click OK to launch the Services app.
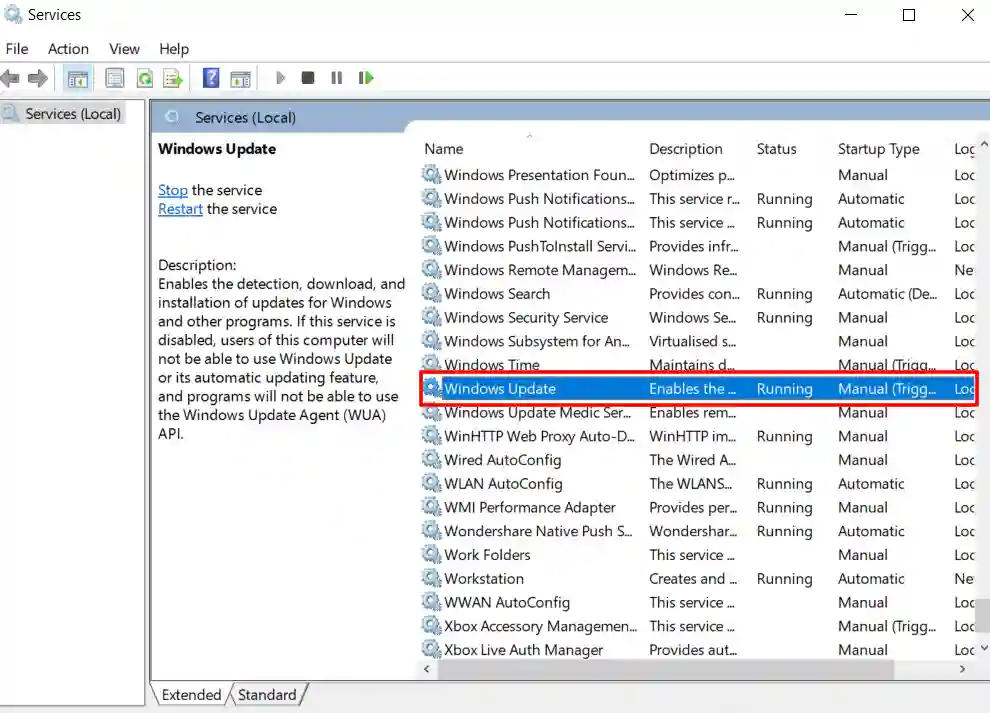
3. Now, scroll down and double-click on Windows Update to open its Properties window.
4. Then, click on Startup Type, and from the drop-down menu, select Disabled.
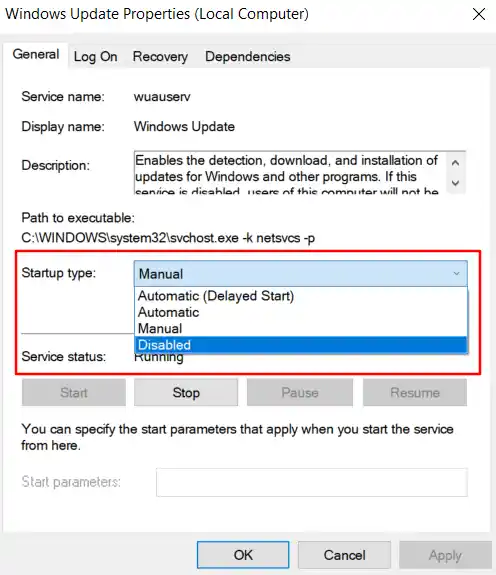
5. After that, click on the Stop button to stop the service from running. Then, Click Apply and then OK to save the changes.

That’s it. After you complete these steps, the Windows Update service will be disabled, and Windows 10 will not automatically download or install any update on your system.
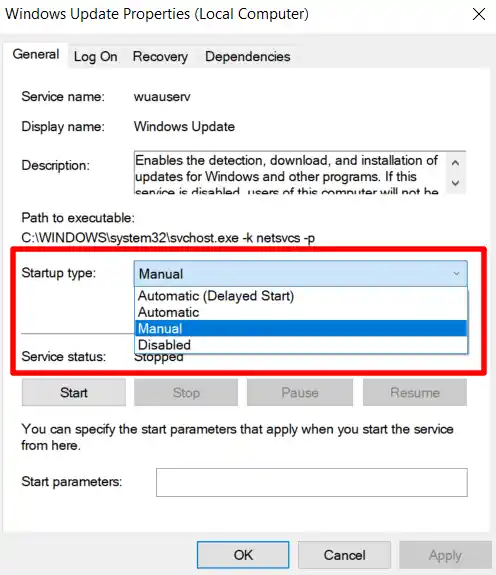
However, you can enable Windows Update service at any time. To do this, simply follow the steps above, but at step 4, instead of selecting Disabled, select Manual, then click Apply, and then click OK.
Method 3: Use Group Policy Editor (For Windows 10 Pro Users)
The third method to stop automatic updates on Windows 10 is to use the Group Policy Editor, which is a tool that allows you to configure various system policies and settings. To use the Group Policy Editor, follow these steps:
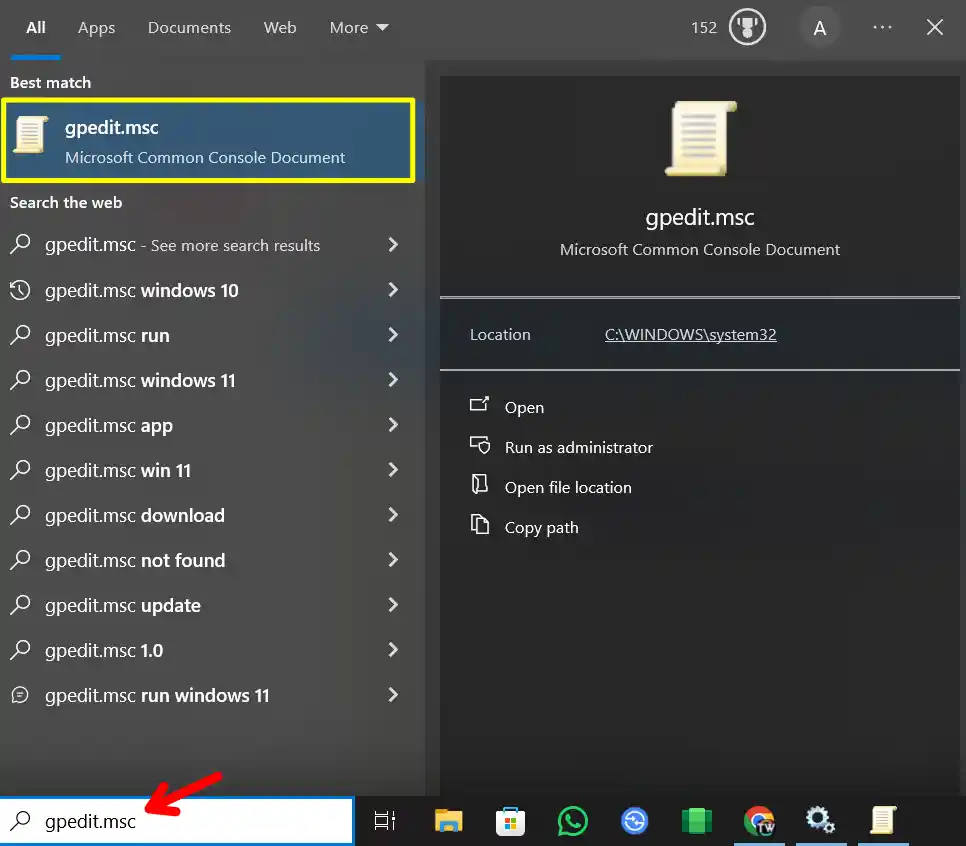
1. First of all, open the Windows Search bar.
2. In the search bar, type gpedit.msc and click the top result to open the Local Group Policy Editor.
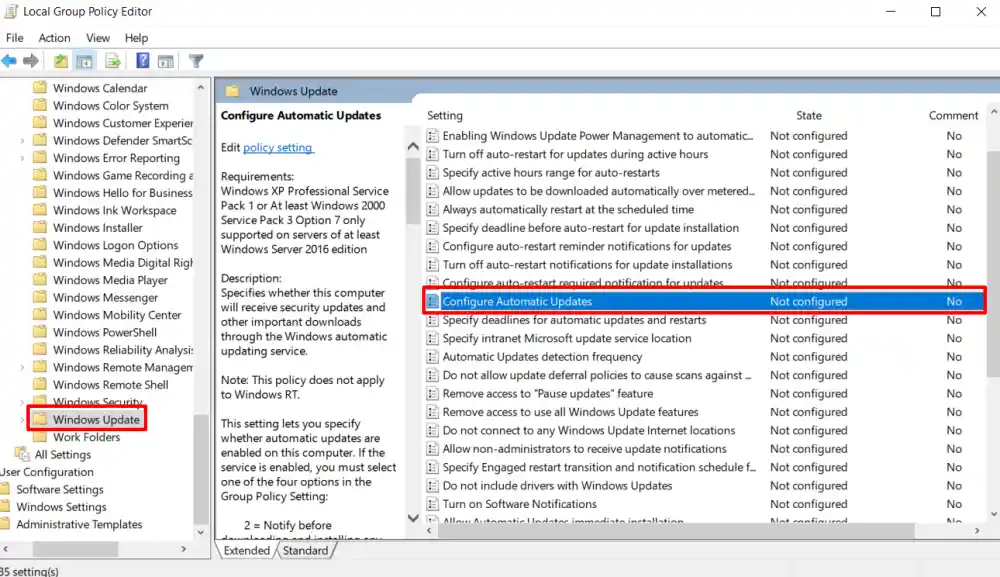
3. Then, go to the following path: Computer Configuration > Administrative Templates > Windows Components > Windows Update
4. After that, double-click on the Configure automatic updates policy on the right panel.
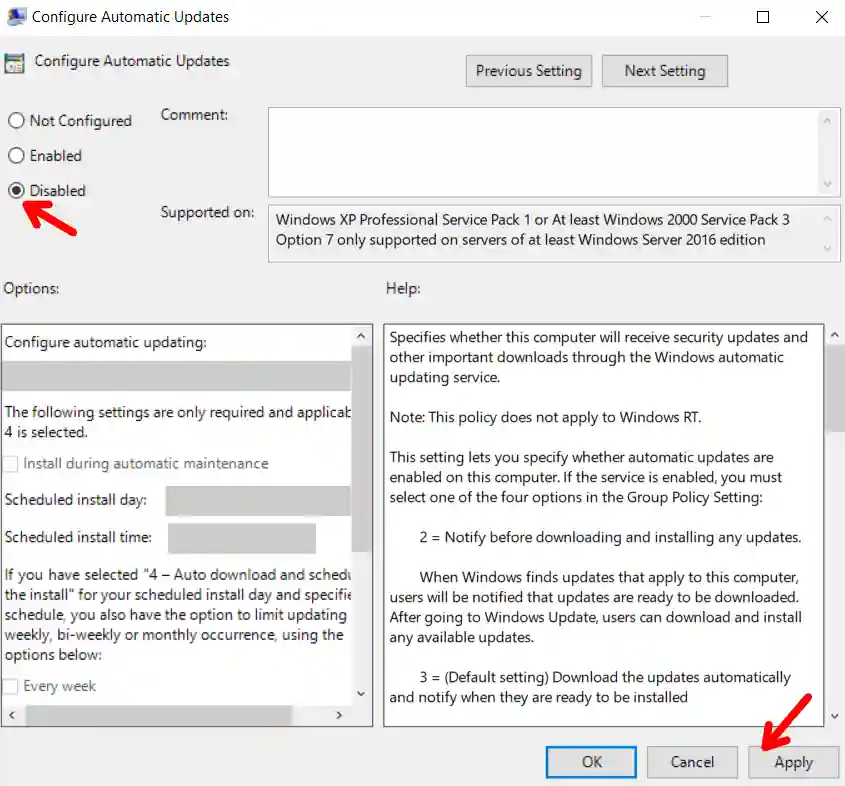
5. There, check the Disable option to permanently turn off automatic Windows 10 updates. Then click Apply, and then click the OK button.
That’s it. Now your Windows will stop automatically downloading updates.
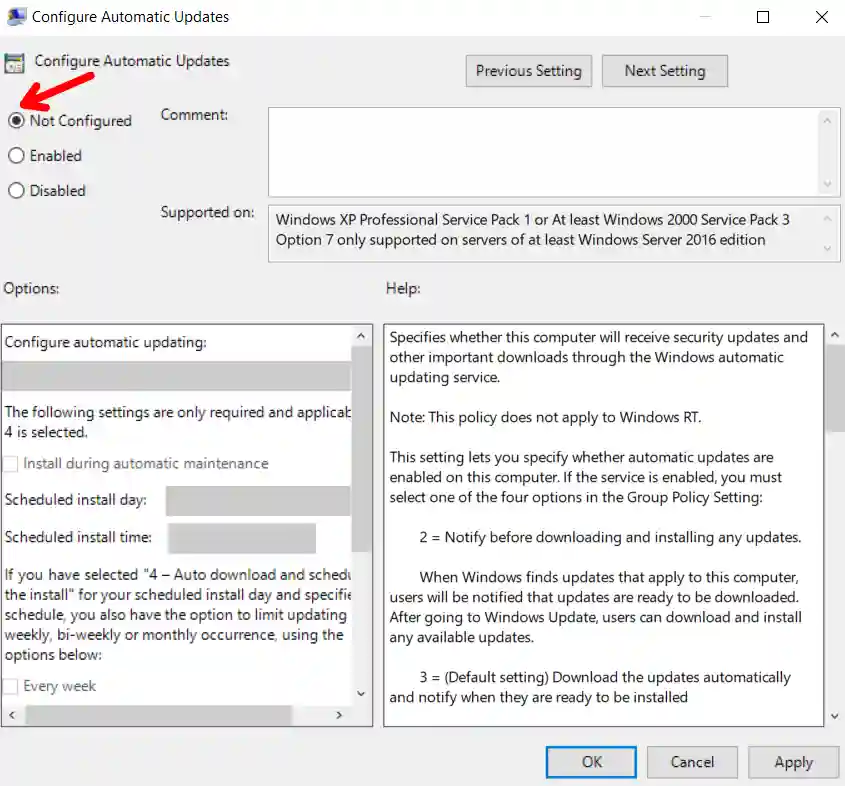
If you want to enable automatic updates on the computer again, you can use the same steps given above, but in step 5, make sure to select the Not Configured option.
Method 4. Set Your Network as a Metered Connection
Windows 10 won’t download updates on a metered connection. This trick works great for stopping updates without disabling them completely. Here’s how to do it.
- First of all, open Settings > Network & Internet.
- Click Wi-Fi (or Ethernet if using a wired connection).
- Select your connected network.
- Toggle Set as metered connection to On.

Should You Disable Windows 10 Updates?
While stopping updates can prevent unexpected restarts, you also miss out on important security patches. It’s a good practice to manually check for updates when it’s convenient for you. To do this:
- Go to Settings > Update & Security > Windows Update.
- Click Check for updates whenever you’re ready.
That way, you stay protected without annoying interruptions.
Conclusion
Windows 10 automatic updates can be annoying sometimes, but they can also be stopped or delayed with some simple methods. In this article, I have provided three easy methods that you can use to stop automatic updates on your Windows.
I hope this article has helped you learn how to stop automatic updates on Windows 10. If you are stuck or having trouble with any step, feel free to comment below.
Recommended Articles
How To Turn Off Online Active Status On Instagram
How To Turn off Autoplay in YouTube on Mobile and Desktop
How To Fix “Failed To Obtain IP Address” Error On Android